Lesson types
Lesson type is a basic course-building block allowing you to deliver the training content in different ways. You can use one or a combination of multiple lesson types when creating a course.
There are three lesson types:
- Linear flow
- Hotspot map
- Quiz
Linear flow
Guide learners through step-by-step instructions
Use
Linear flow is a lesson type designed for learning step-by-step procedures in a **specific order. Linear flow can be used to guide learners through specific actions, or guide them through a specific environment. It can also be used to explain instructions requiring a multi-step process, for example, how to inspect a specific area.
Alternatively, Linear flow can be used to build slide-based content, where slides are not associated with the visual background - scene.
Core features
Expanded window
When you click “Expand window” in the top bar of the lesson page, you can create a simple page that will present the content on full screen.
- Click “Add new step”
- Click “Expand window”
- Click “Add section”
- Choose layout and start adding widgets as needed
If you use expanded window in Linear flow, the page is not associated with the Scene. The content is presented on full screen.

💡 Do you want to create a slide-based course that doesn’t require visual background - scene?
Step with expanded window is a great way of presenting slide-based content when the visual background is not relevant for that specific piece of content.
Tip: To build a slide-based e-learning, add voiceover and subtitles to every step, set progress restriction until audio completes, and finish the page with nice visuals or interactive widgets. Have a look at this example.
Hotspot
You can add a hotspot to your step by clicking “Add hotspot” in the top bar of the lesson page. Hotspots allow you to mark a location of specific actions within the Scene. By adding hotspots to each step one by one, you can guide learners through a sequence of actions in within the Scene.
- Click “Add new step”
- Click “Add hotspot” and choose between Text hotspot or Hotspot area
- Set the position of the hotspot by clicking a specific location in the Scene
- Click “Done”
- Name the hotspot
- If needed, add content to the panel on the side
If you use hotspot in Linear flow, the Step is associated with your Scene and the content will be visible on the side of the Scene, or full-screen, if learners click the hotspot to open it.
You can combine steps with expanded window and hotspots as needed.
💡 Do you want to build a procedure trainer? Adding hotspots to your steps will help learners to visualise the procedure within visual background - Scene.
Tip: Use branching scenarios, if the procedure changes based on specific circumstances or a learner's decision. Have a look at this example.
Hotspot map
Allow learners to explore content on their own
Use
Hotspot map is a lesson type designed for environment familiarization where learners can freely explore the environment.
It can be used to instruct a learner about the location of safety equipment in a vehicle or facility. You can also use the Hotspot map to deliver an interactive and explorative learning experience. It is suitable for onboarding courses where learners get familiar with the environment.
Core features
Hotspot map consists of two core features: Hotspots and Start message.
Hotspots
Hotspots indicate areas of interest. Content of each hotspot can appear in three different styles:
- Full-screen hotspot - the content of the hotspot appears in full screen
- Small hotspot - the content of the hotspot appears in a smaller window
- Label - if the hotspot doesn’t contain any content, only label will appear
Start message
A Hotspot map shows all hotspots at the same time. If you want to add an introduction page that will appear before the Hotspot map, use Start message. The Start message will be triggered immediately after learners click the Hotspot map in the menu.
To add a Start message in Hotspot map:
- Click Start message
- Fill in title, choose layout and add widgets as needed
You can add one Start message in a Hotspot map.
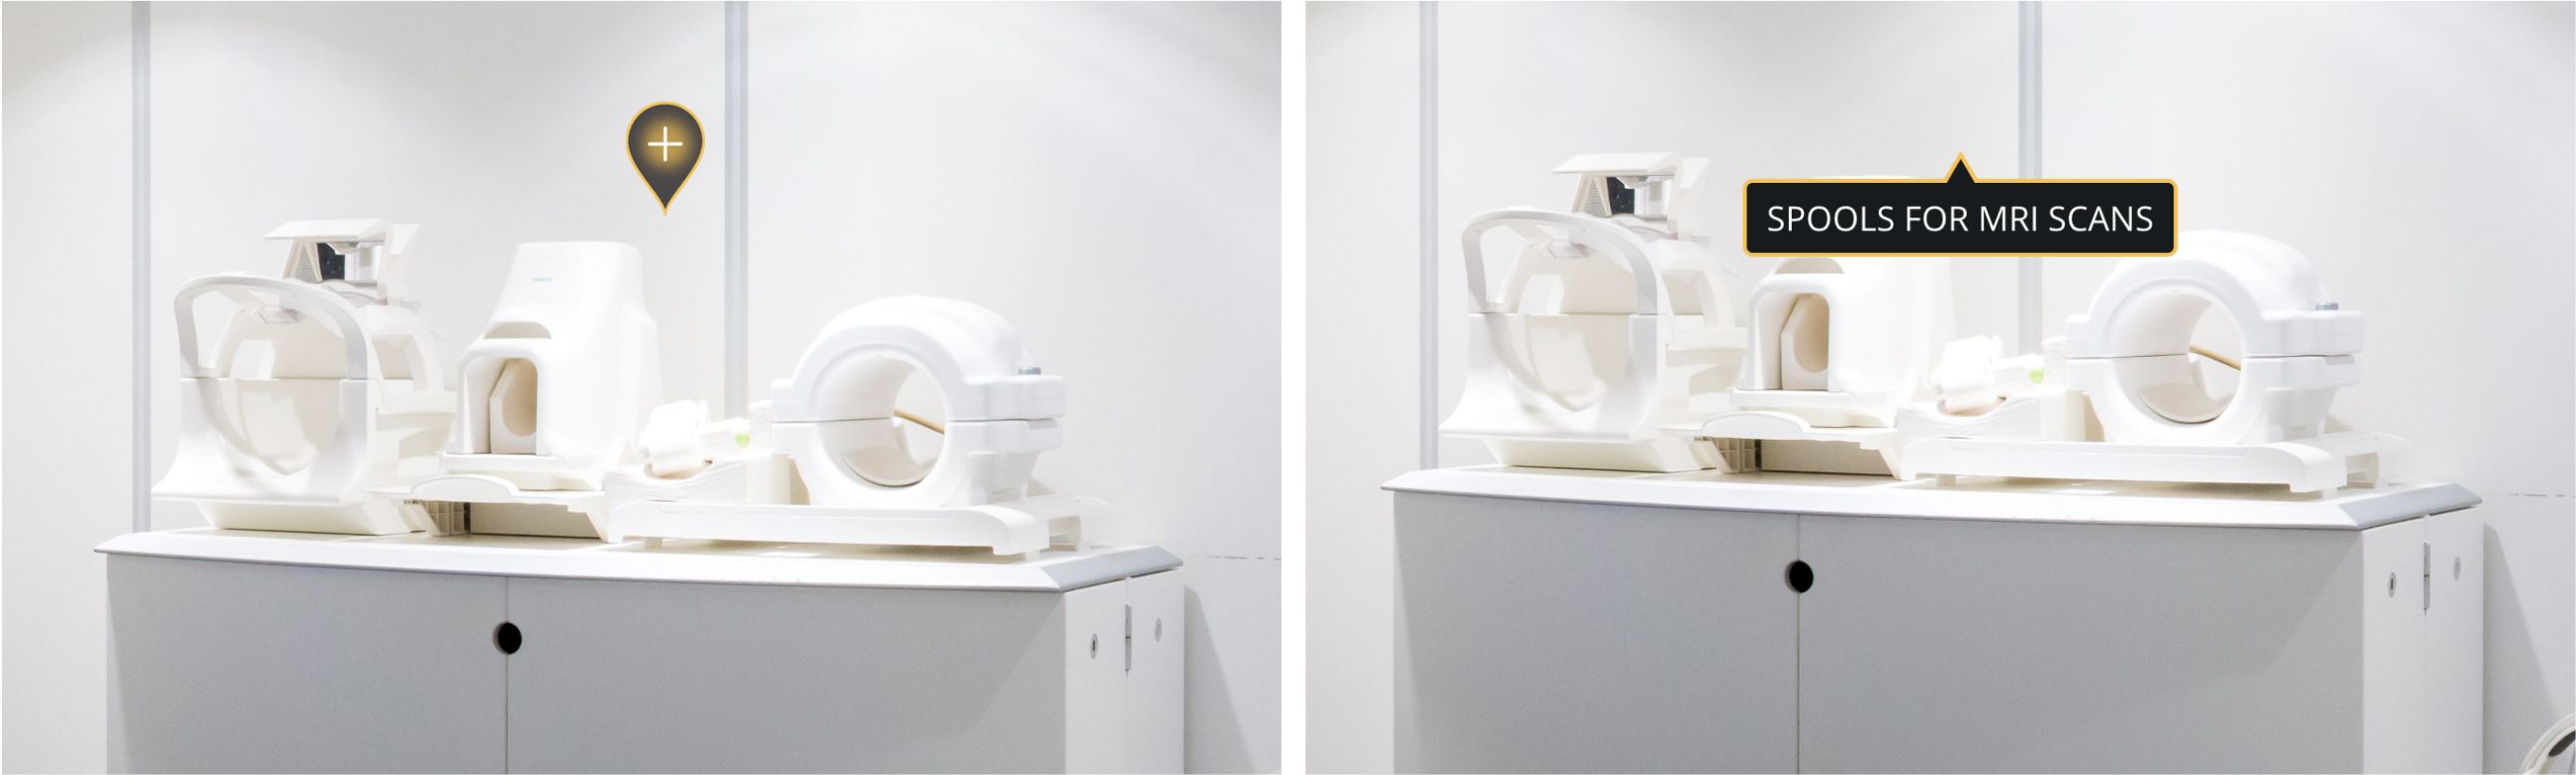
Hotspot icon
Pin point a specific location precisely in your visual environment.
- Add new hotspot and choose Hotspot icon
- Locate hotspot icon on the Scene
- Choose layout and start adding widgets as needed
Optionally, don’t add any widgets and fill in title only - title will appear when learners click on the hotspot.
💡 Do you want to build a safety equipment trainer?
Pinpoint exact location of safety equipment within your environment and include expanded procedures within hotspots.
Tip: Add multiple tabs within each hotspot to split the content into topics, or use it to show multiple equipments located at the same location. Have a look at this example.
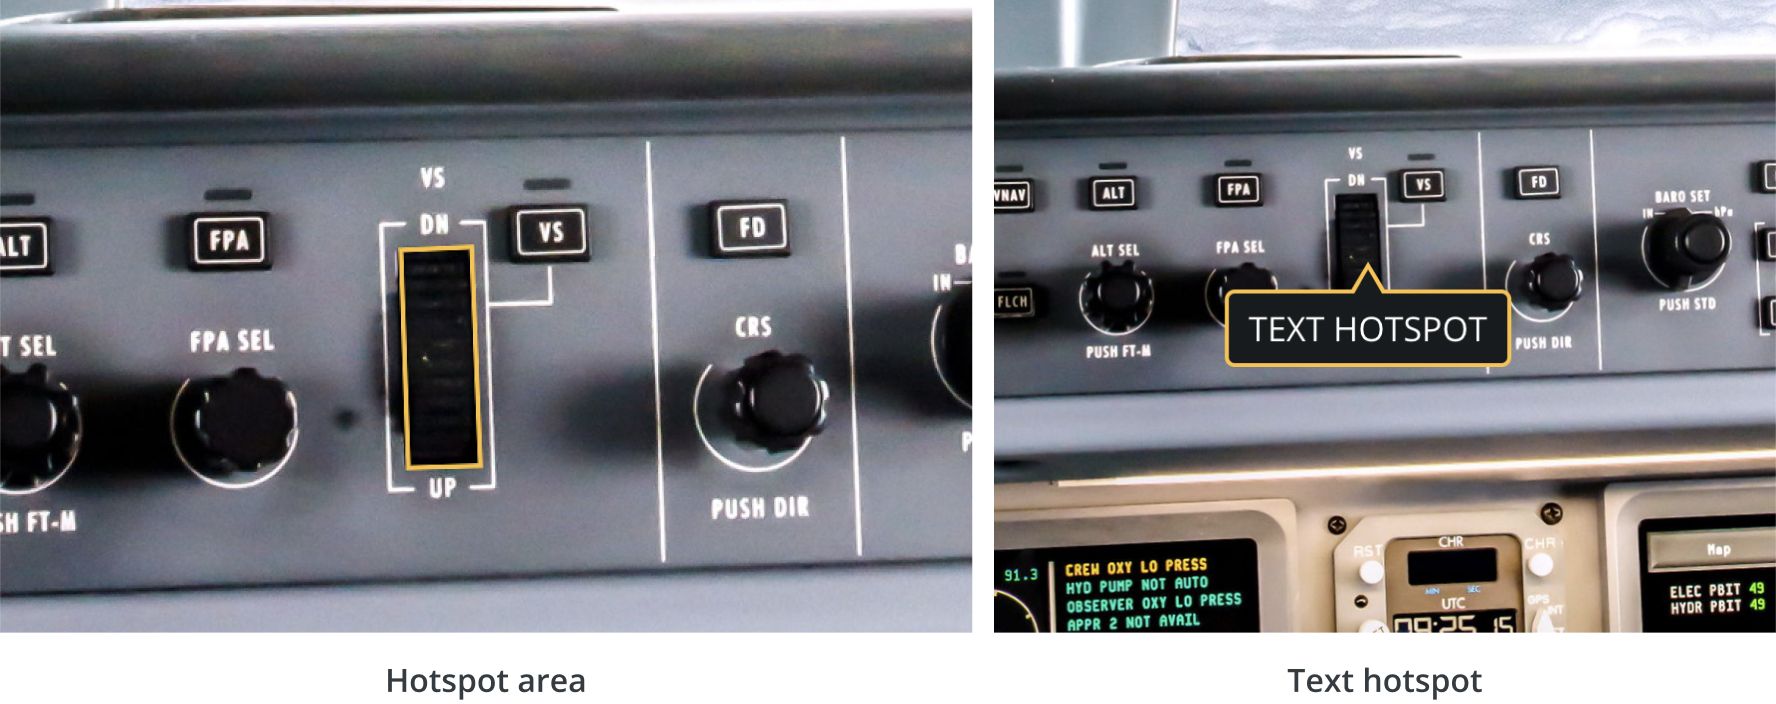
Hotspot area
Highlight specific area in your visual environment.
- Add new hotspot and choose Hotspot area
- Click around the area you want to highlight in the Scene
- Press spacebar or click Confirm selection to stop outlining the area
- Click Done, choose layout and start adding widgets as needed
Optionally, don’t add any widgets and fill in title only - title will appear when learners click on the hotspot.
💡 Do you want to build a familiarization trainer?
Highlight panels and instruments that learners should learn about. Add procedures, images, videos and schematics to the hotspot.
Tip: Add multiple tabs within each hotspot to split the content into topics, or use it to show multiple equipments located at the same location. Have a look at this example.
Tabs
Each hotspot can contain multiple Tabs which allow you to structure content better.
- Above the hotspot title, expand Tabs
- Click +Add new tab
- Write a unique title for the new Tab, choose layout and start adding widgets
Each Tab can contain unique audio, subtitles and restrictions. To mark hotspot as complete, all tabs must be opened and completed.
You can reorder the Tabs by dragging and dropping them within the Tab list.
💡 Tip
Use Tabs if one location has multiple items that you want to demonstrate. For example, one locker can contain both, fire extinguisher and fire protective gloves.
Alternatively, you can use Tabs to structure the topics. For example, you can divide explanation of electrical panel into General Overview, Schematics, Use of the Panel.
Quiz
Test learners’ knowledge with questions
Use
Learn by practise. Quiz is a lesson type that allows you to practise procedures and scenarios. It can also be used to create interactive quizzes.
Each Quiz lesson can be tracked and has a passing score that can be changed as needed. The score is calculated based on learners’ first attempt. When learners answer a question incorrectly, they have to retry, until answered correctly, but the score is always calculated based on the first attempt. Once learners complete the Quiz with a score equal or higher to a passing score, the lesson is considered complete.
The course can contain multiple Quiz lessons. To complete the course, learners must complete all Quiz lessons with required passing scores. Completion can be tracked in the LMS.
Core Features
Quiz consists of two core features: Question and Hidden Area. You can combine these as needed.
Question
Questions created in Quiz lesson, are being tracked by the LMS, once exported. Question content is created in the same way as content in any other lesson.
- Add Question
- Choose layout
- Add one of the interactive widgets
Quiz lesson considers each interactive widget as a unique Question. If you will add multiple interactive widgets on one page, the score will be calculated based on the number of interactive widgets on the page.
For example, you can create 10 separate Questions (each having one interactive widget), or add 10 interactive widgets on one Question page. It depends on your preference - whether you would like to have all 10 questions on one page or you want the learners to click through the questions one by one.
Hidden Area
Hidden Areas created in Quiz lesson are being tracked by the LMS, once exported. Hidden Area is not visible to learners. When the Hidden Area is correctly located by learners on the first attempt, it is considered a correct answer.
- Add Hidden Area
- Click around the area you want to highlight in the Scene
- Press spacebar or click Confirm selection to stop outlining the area
- Click Done
Hidden Area doesn’t contain any content expect for the title, which is visible only for the author. Multiple Hidden Areasin sequence allow learners to locate Hidden Areas without any interruptions.
Course completion
Set up tracking and passing score of the quiz as needed.
- Select desired Quiz and click the three dots in the top right corner
- Select “Track this test”
- Choose passing score
Once learners complete the lesson with a passing score, the lesson will mark as complete in the menu and in the LMS.